On this episode of Paola’s Marketplace finds, we transform this questionable set of rims for my car into an unrecognizable set of wheels! But beauty doesn’t come without pain… stay tuned everyone!
What was my goal this week?
To learn how to get my winter tires on! But, this would be a process. For context, I only have my winter tires but they don’t have rims on them; so, I usually take them into a shop to get them swapped. My car friend recommended I just get a set of rims and save the money of having to take them in each year. He offered to do them for me and teach me so I can do it one day too.
The problem was finding rims. My car isn’t anything fancy or new, it’s a Chevy Tracker from the ’90s. For some reason, finding rims of that particular size with that bolt pattern proved to be a tricky challenge. Luckily, my friend is also a Facebook Marketplace pioneer and found a rather cheap set in Surrey…so, off we went to get some rims!
How did it go?
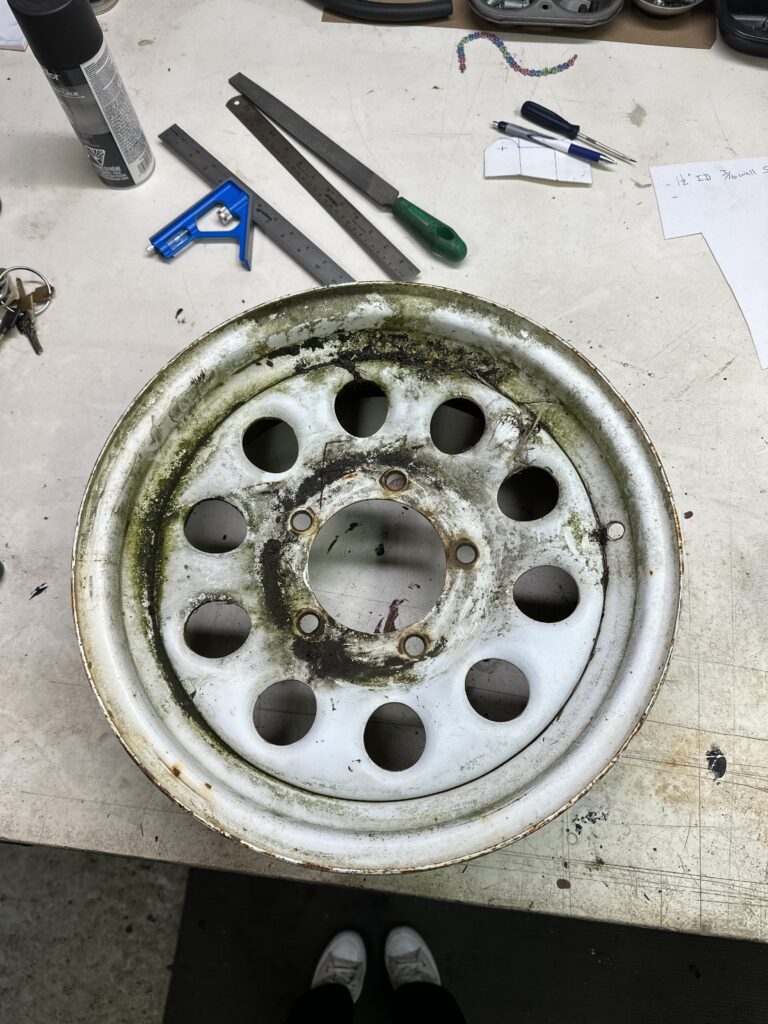
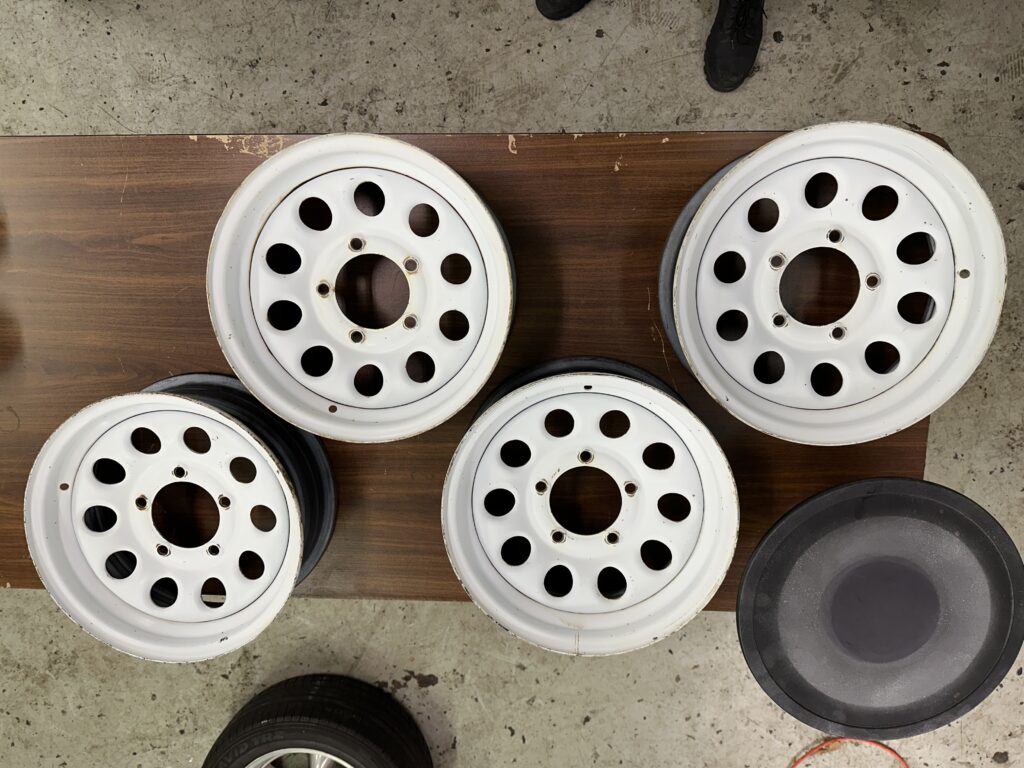
The rims needed a whole makeover, honey! But since we had the whole evening, it was fun to see how the transformation would end up.
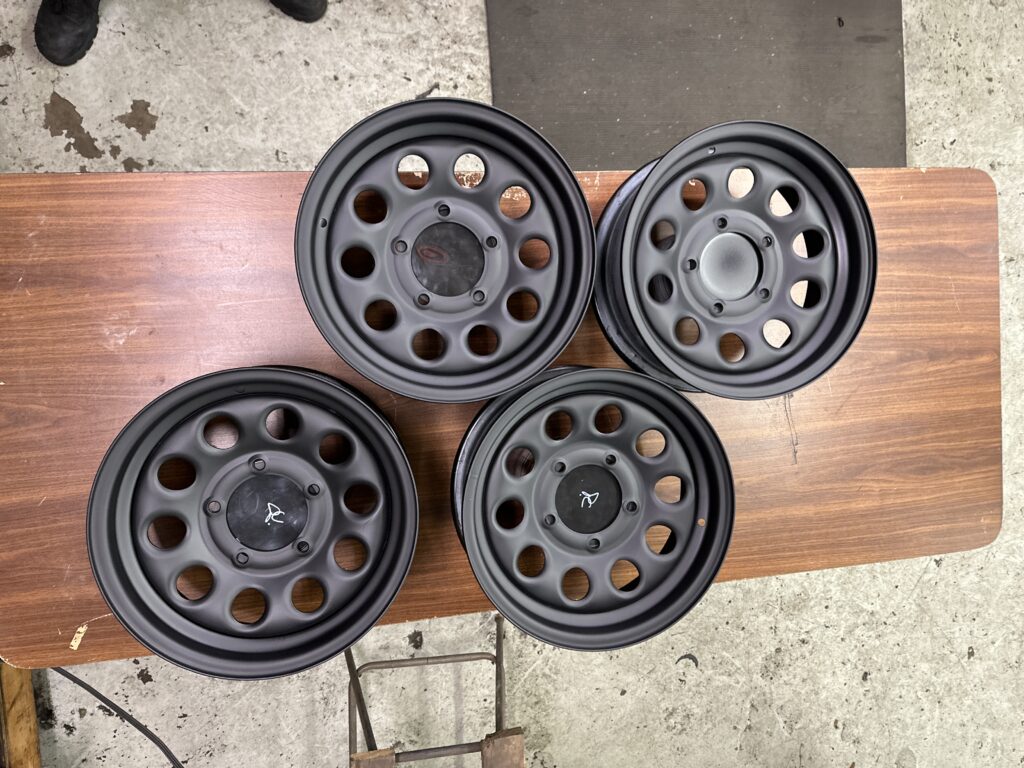
Now, I’m no car expert, but a red body with white rims isn’t exactly hot. The rims were stained, dirty, and painted white. But all that mattered was that there were no major bumps or dents. We scrubbed, power washed, and scrubbed some more. With the rims all clean, we proceeded to sand, prime, and spray paint them matte black. Afterwards, my friend took them to a shop to have the tires mounted, brought them back, where we were ready to finally swap them over on my car.
But, disaster struck!
My studs spun out. On my back wheels. Yikes. Our guess was that previous shop owners had over-torqued my wheels over the years, and the fact that my far was getting a little old. This meant my friend had to order studs, lug nuts, and figure out how to disassemble the front and back brakes…since my car is odd and apparently you have to disassemble everything to replace the studs. What a headache!
How did I do it?
Time, patience and a lot gratitude. My friend was kind enough to offer to do everything because a normal car shop would charge me an insane amount for this job. The unfortunate part to all this was having to run around to different store to see who had the proper parts, ordering them, then encountering new little issues along the way. I definitely learned a lot and my friend knew what they were doing the whole time… it was just a lot of extra labour that was unexpected! I kept my friend company every time we went to work on it and I helped where I could. For now, I don’t have a car but for my friend’s sake I hope it goes smoothly in the next coming days!

How do I feel?
I feel like I learned a lot about my car and some mechanical things I wasn’t familiar with, but I do feel bad for my friend putting in so much work on top of working full time! I’m very grateful and obviously paid him. He even said it was an interesting experience for him as well and isn’t bothered to help me out at all. What an amazing person. 🙂
Next week’s goal
Hopefully, to finish repairing the car. But I also have a little travel plan I’ve been meaning to finalize. Stay tuned for the next episode, folks!
Song of the Week