I’m sure some readers have figured out that I take a liking to miniatures; models, pumpkins, anything really. Well…surprise. This week, I decided to put a pause on pumpkin carving and decided to play around with a miniature cat in a cube.
What was my goal this week?
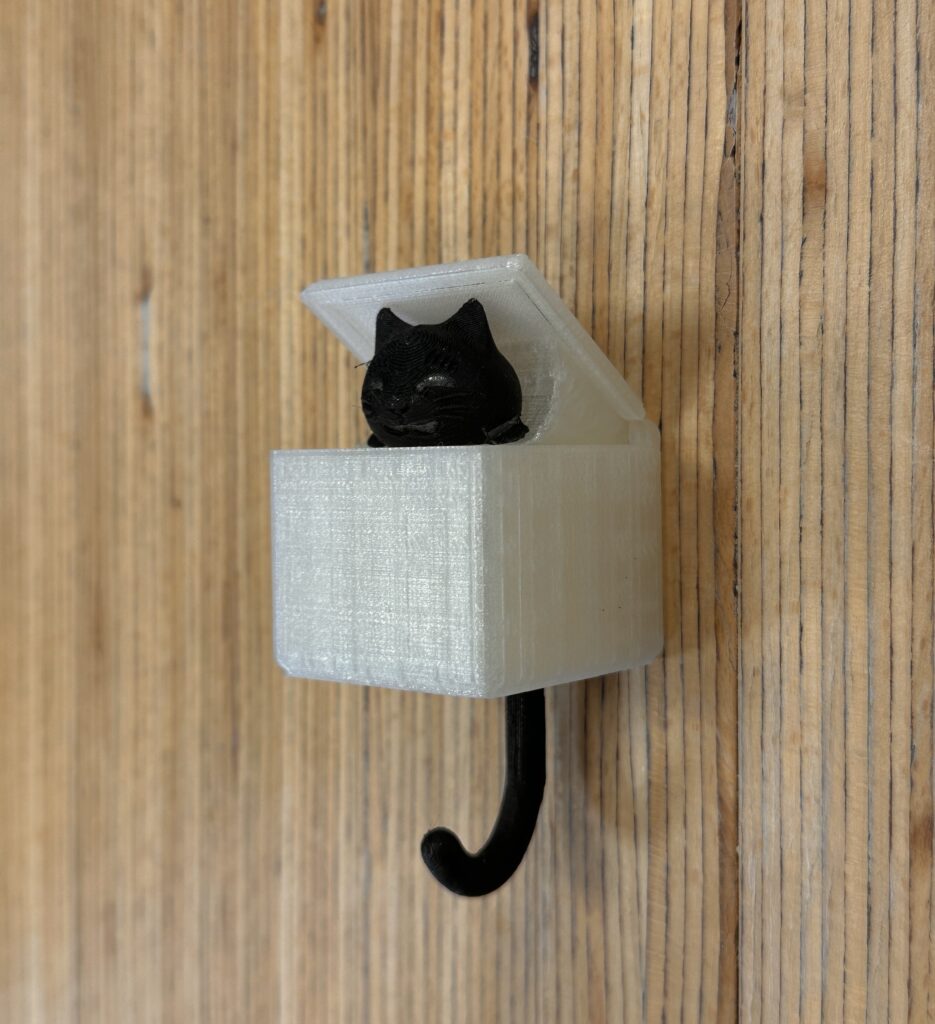
I wanted to put a recently acquired skill to the test: 3D printing. With the help of a class I’m taking, I wanted to 3D print a model for myself that had an element of fun but also utility. The miniature model I printed was a cat key hook; the head of cat hiding inside of a box with its tail hanging out the bottom. When you hang your keys on the hook of its tail, a lever inside the box raises the cats head to peep out of the box. I needed a hook for my keys anyways, so instead of a regular Command hook, why not go for a peeping cat instead?
While I do know how to use CAD software, I opted to print a free-to-use file online than design my own because I still had school and work to do during the week. Besides, I just wanted to print something for fun.
How did it go?
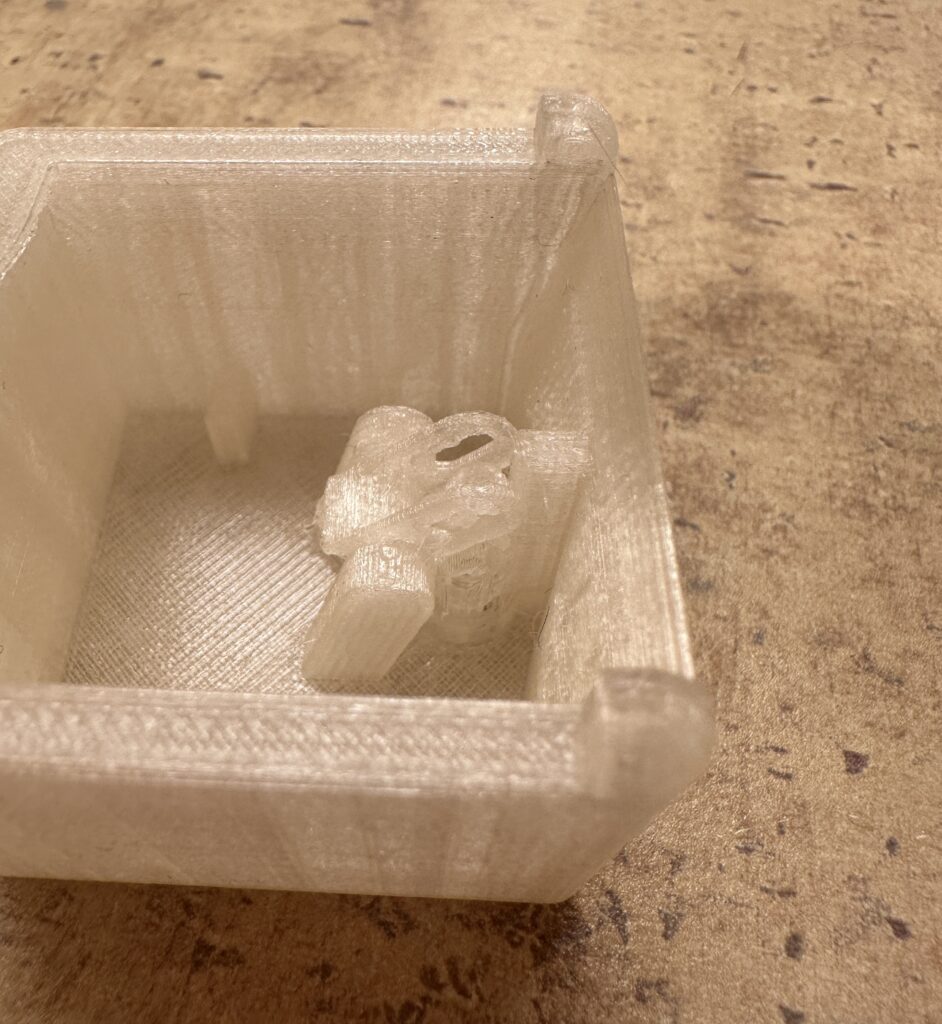
Let’s just say, the cat melted a little. Specifically, the lever on the inside that’s meant to push the cat’s head out of the box. Since this was my first print, I can’t pinpoint exactly what happened, but my guess is that the lever is so little and the design is questionable, that a print failure was bound to happen. The lever basically melted because there wasn’t enough time between the layers to cool down. While initial printing looked promising, the failure must have happened after about 2 or 3 hours of printing.
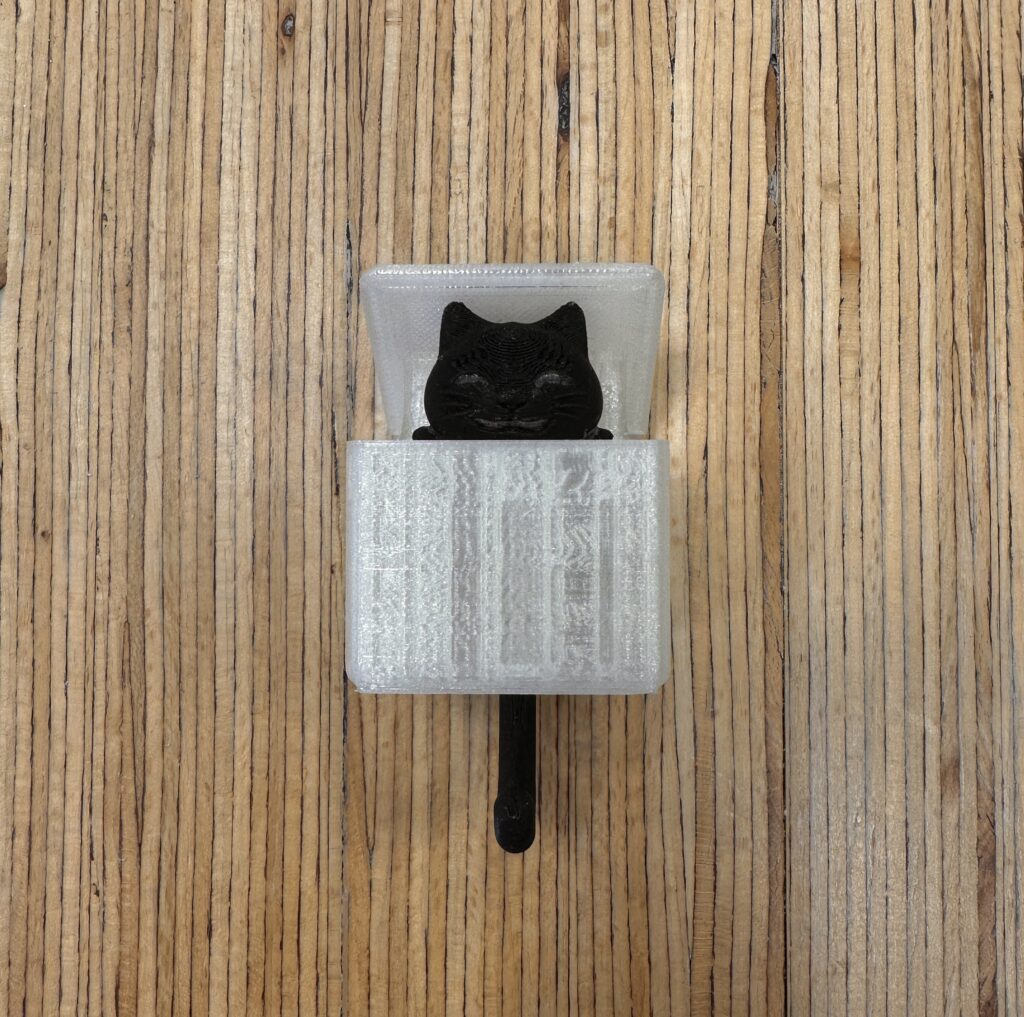
Luckily, the rest of the pieces printed correctly! While the melted lever took away functionality, I was still left with pieces that I could assemble and paint to have a cute looking decoration. It was honestly just cool to say that I now knew how to set up a file, go to a 3D printer, and print anything that’s feasibly possible.
How did I do it?
Like I said, I opted to just print a free file from a website called thingiverse.com. My cat key hook by aarruti has everything ready to go, so all I had to do was set some printer adjustments in a program called Ultimaker Cura. I then took my file on a USB to the SFU Makerspace located on the Burnaby campus. There, all you have to do is confirm that file setting are alright with a supervisor and begin printing. After about 5.5 hours, all the parts had printed (semi-alright) and I took my little cat home to assemble and paint.
While I accepted that it wouldn’t be able to hold my keys anymore, it was a cool experience nonetheless and looks pretty presentable on the outside either way!

How do I feel?
Initially a little dissapointed, but overall content with the fact that I did my first 3D print. Having this first experience has actually made me excited to print other things in the future. I don’t ever plan on buying a 3D printer because I don’t see this becoming a hobby, so I might as well make the most out of the free resources I have access to while I’m still at SFU. I do wish I’d learned all of this sooner and not in my last semester, but I guess it makes my last couple visits to campus a lot more memorable.
Next week’s goal
With Halloweekend coming up, I’m actually rather excited at what I could be up to. From my mini pumpkin to going out and dressing up for someplace, I’d like to try and do 2 activities this weekend, just because…’tis the season.
Song of the Week